terminal-widgets
🖥 Terminal Widgets
This tool enables you to create and run fully customisable dashboards directly in your terminal.
Getting started •
Configuration •
Adding new widgets •
Examples •
Contributing •
License


⚠️ Note: This package is only compatible with Unix-based systems.
⚠️Upgrading to 2.0
Version 2.0 introduces breaking changes. Please see the migration guide for instructions on updating your code.
🚀 1. Getting started
1.1 Installation from PyPI
- Install:
pip install twidgets - Initialize:
twidgets init - Run:
twidgets⚠️ Requires Python Version 3.10+
1.2 Installation from Source
- Clone this repository
- Install dependencies:
pip install -r requirements-dev.txt - Initialize configuration:
python -m twidgets init - Run:
python -m twidgets⚠️ Requires Python Version 3.10+
For full documentation see Setup Guide.
✨ 2. Configuration
2.1 Changing standard colours and configuration at ~/.config/twidgets/base.yaml
If you let anything blank, it will fall back to the standard configuration
However, you will get warned.
Example:
use_standard_terminal_background: False

background_color:
  r: 31  # Red value
  g: 29  # Green value
  b: 67  # Blue value

...
2.2 Configure secrets at ~/.config/twidgets/secrets.env
Example:
WEATHER_API_KEY='your_api_key'
WEATHER_CITY='Berlin,DE'
WEATHER_UNITS='metric'
NEWS_FEED_URL='https://feeds.bbci.co.uk/news/rss.xml?edition=uk'
NEWS_FEED_NAME='BCC'
2.3 Adjust widgets and layouts at ~/.config/twidgets/widgets/*.yaml
Example:
name: 'clock'
emoji_title: ' ⏲ Clock '
title: ' Clock '
enabled: True
interval: 1
height: 5
width: 30
y: 4
x: 87
z: 0

weekday_format: '%A'  # day of the week
date_format: '%d.%m.%Y'  # us: '%m.%d.%Y', international: '%Y-%m-%d'
time_format: '%H:%M:%S'  # time
For full documentation see Configuration Guide.
⭐ 3. Adding new widgets
Adding new widgets is very easy. For a simple widget, that does not require heavy loading (no update function),
you only need to define a configuration and 2 python functions
Naming schemes are described here.
You can create an infinite number of widgets, the file namescustom.yamlandcustom_widget.pyare just examples.
3.1 Define Configuration (.yaml)
Create the configuration file at ~/.config/twidgets/widgets/custom.yaml and set interval = 0 for simple widgets:
name: custom
title: ' My Custom Widget '
emoji_title: ' ▦️ My Custom Widget '
enabled: true
interval: 0  # For simple widgets (no heavy loading, no `update` function)
height: 7
width: 30
y: 1
x: 1
z: 1
3.2 Write the Widget Logic (.py)
Create the widget’s Python file at ~/.config/twidgets/py_widgets/custom_widget.py
Then define draw and build functions.
Example:
from twidgets.core.base import Widget, WidgetContainer, Config, CursesWindowType

# Define the draw function for content
def draw(widget: Widget, widget_container: WidgetContainer) -> None:
    # Initialize the widget title, make it loadable and highlightable
    draw_widget(widget, widget_container)

    # Add your content (list of strings)
    content: list[str] = [
        'Welcome to my new widget!',
        'This is a test.',
        'It was very easy to create.'
    ]
    widget.add_widget_content(content)

# Define the build function
def build(stdscr: CursesWindowType, config: Config) -> Widget:
    return Widget(
        config.name, config.title, config, draw, config.interval, config.dimensions, stdscr,  # exactly this order!
        update_func=None,
        mouse_click_func=None,
        keyboard_func=None,
        init_func=None,
        help_func=None
    )
For full documentation see Widget Guide.
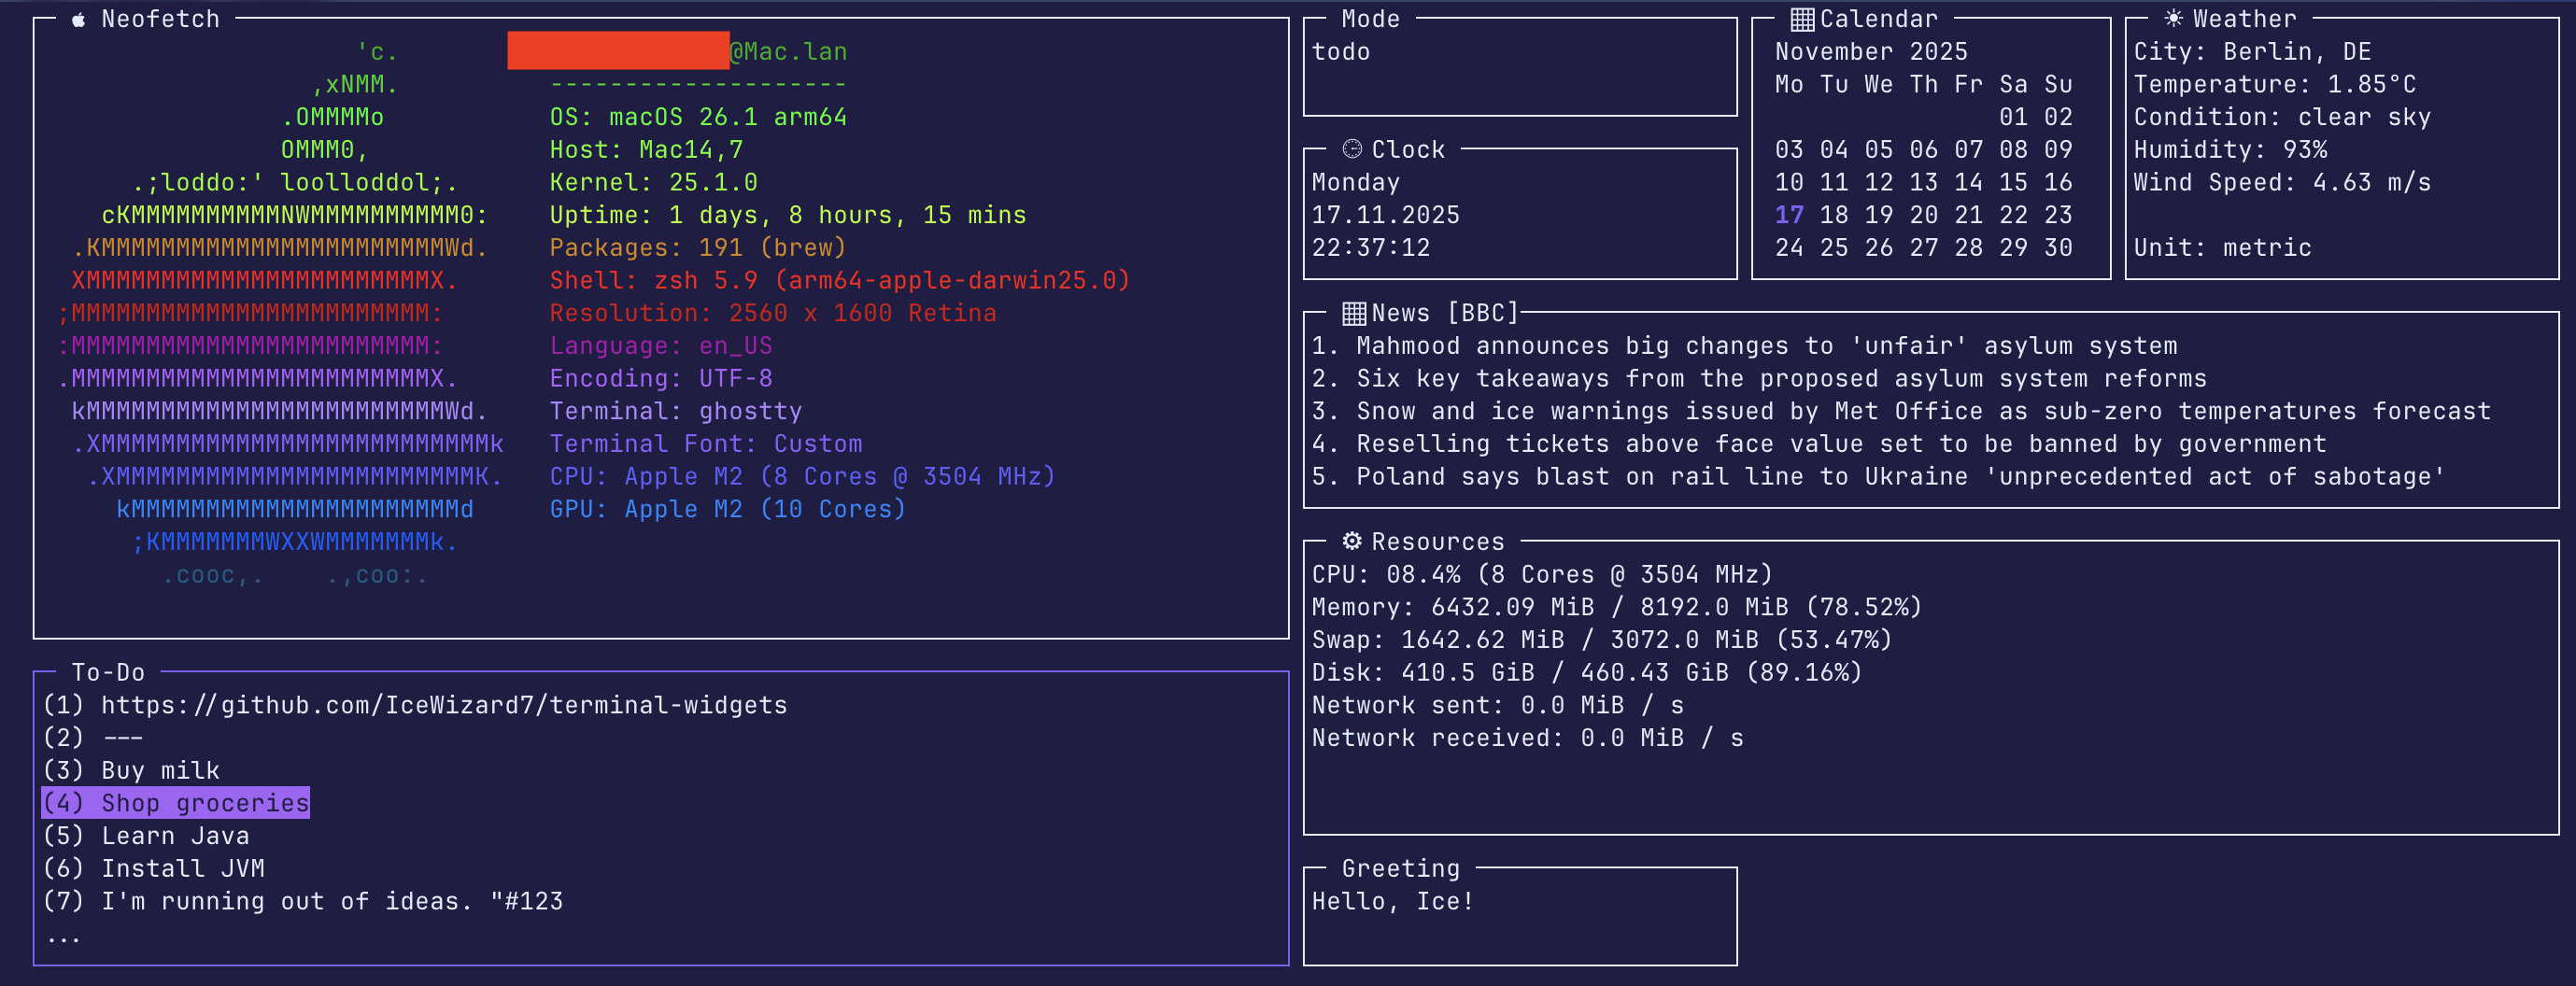
🌅 4. Examples
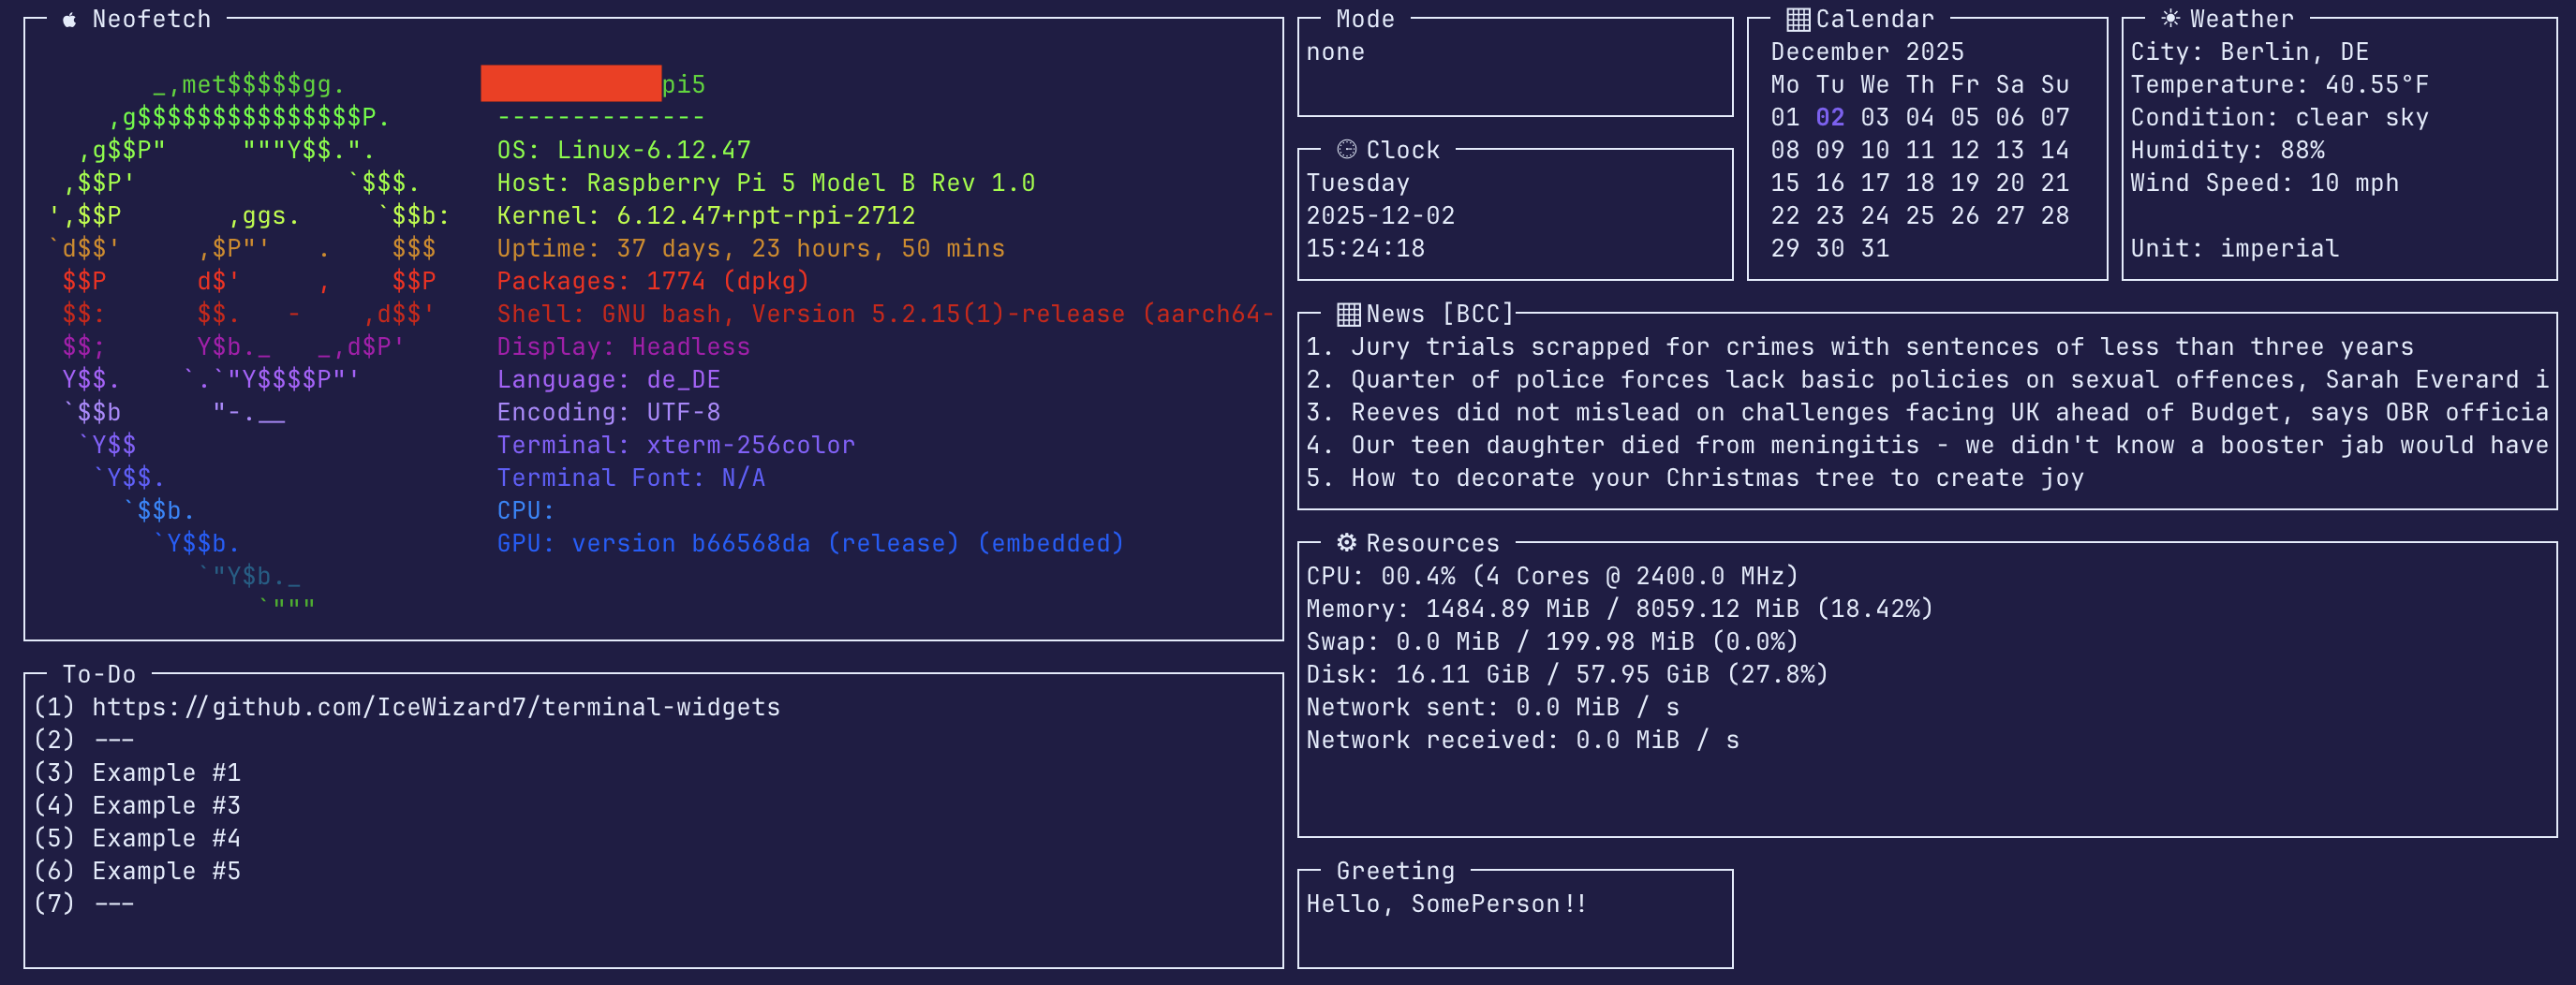
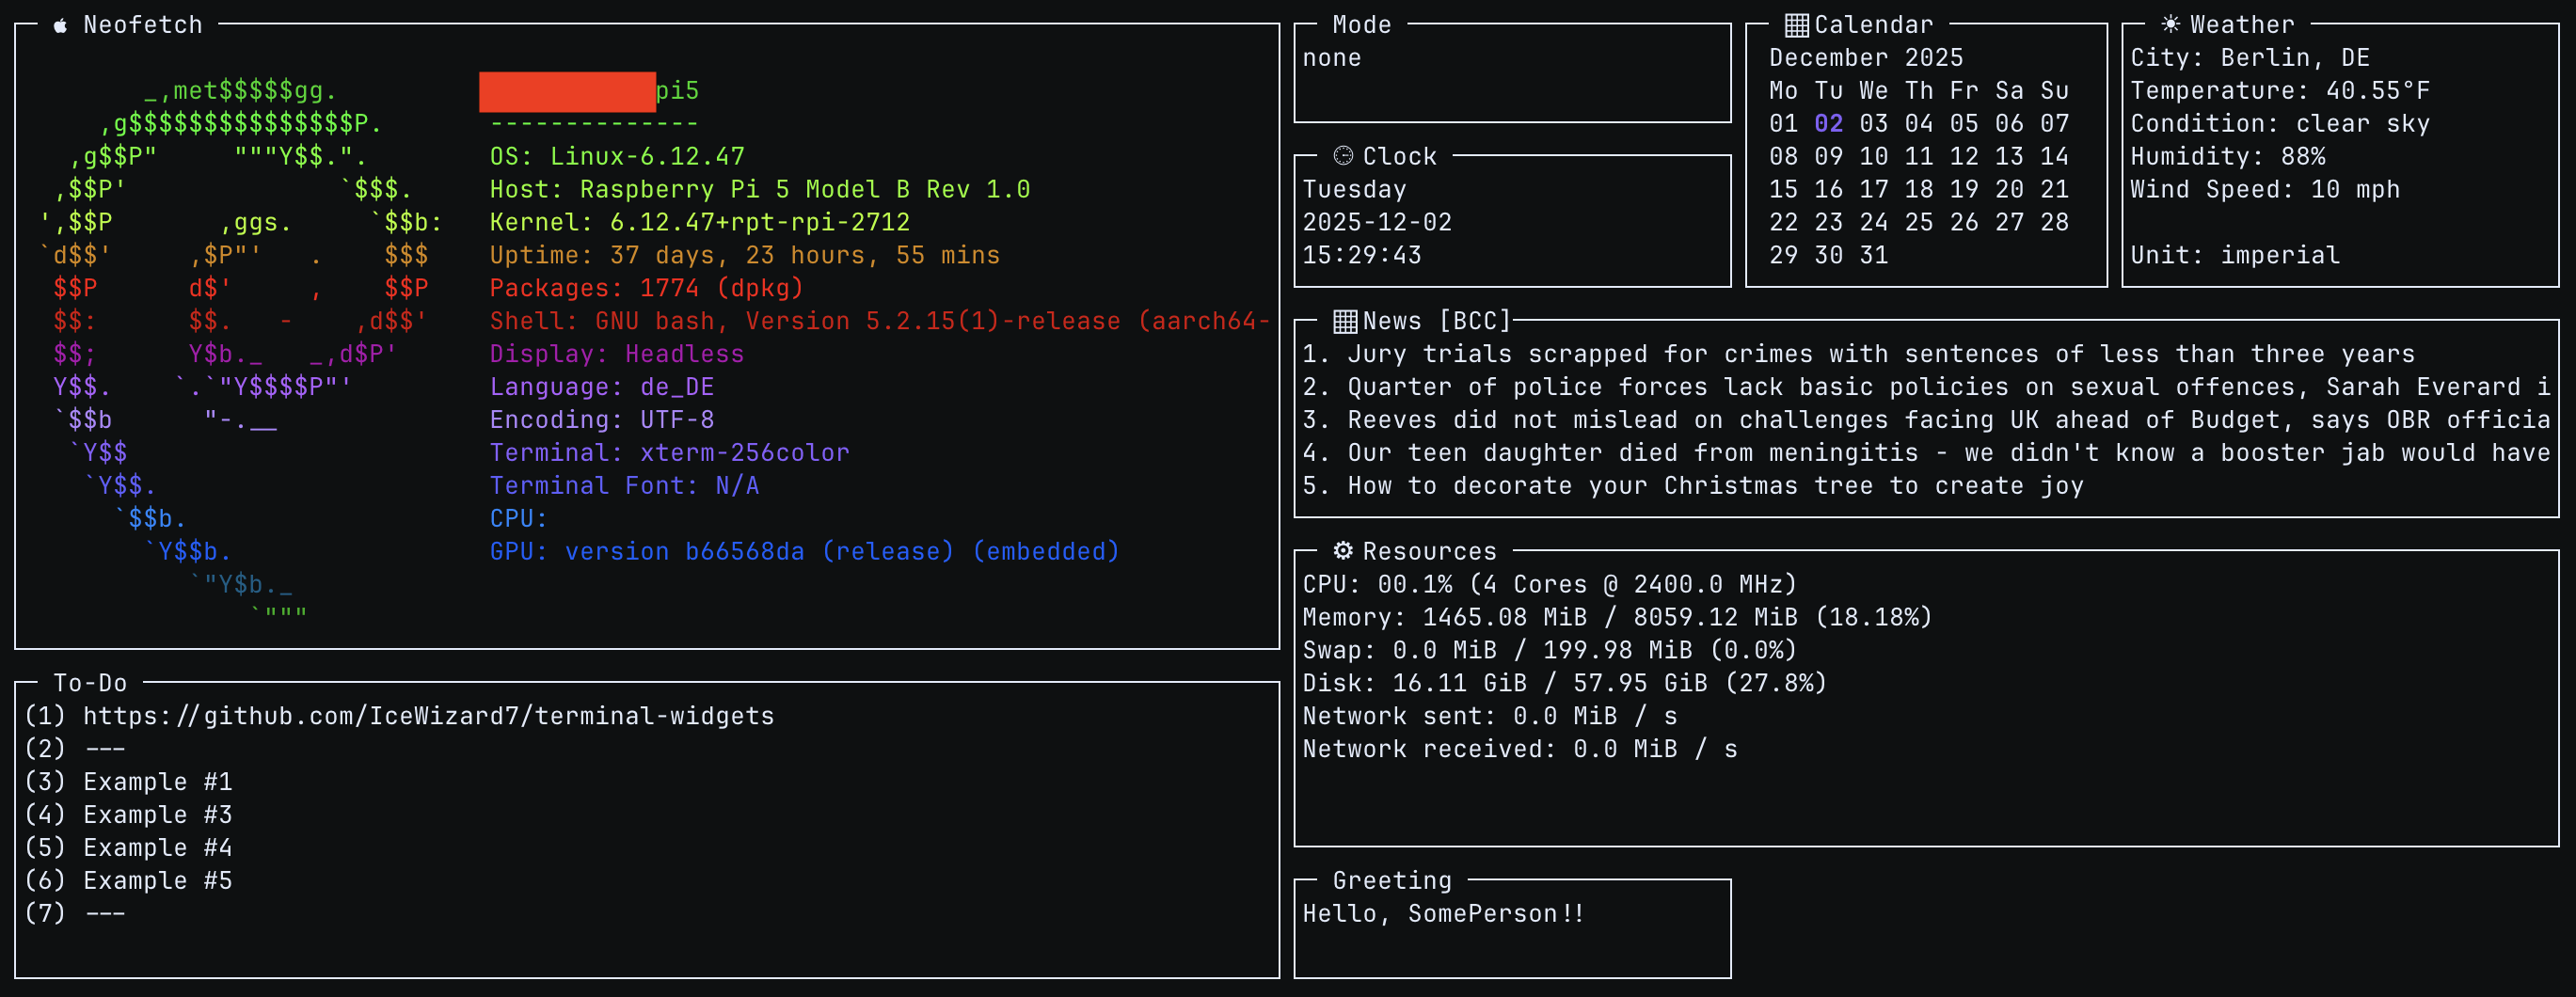
For all examples see Examples.
🧩 5. Contributing
Help the project grow: create an issue or pull request!
📜 6. License
See License